Up one level The Log Rover Project » Putting things together
Putting things together
This is the bit that takes the time, but looks good (for a while at least)

Previous page Next page 257-288 (of 402 found)
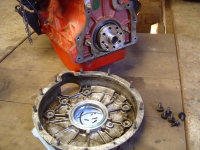
 then get the big bits out

then get the big bits out

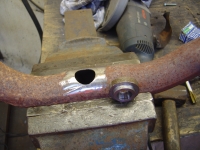
 finished hole and lambda boss ready to go

finished hole and lambda boss ready to go

 welded up

welded up

 back to my garage now, and lambda trial fitted

back to my garage now, and lambda trial fitted

 then mounted on Log Rover, tucked out of the way, and wired up

then mounted on Log Rover, tucked out of the way, and wired up

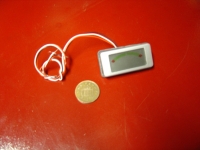
 Useful little 0-1v gauge made by Lascar (although I think may be out of stock now) - after a bit of waiting I found two very  cheap on Ebay.

Useful little 0-1v gauge made by Lascar (although I think may be out of stock now) - after a bit of waiting I found two very cheap on Ebay.

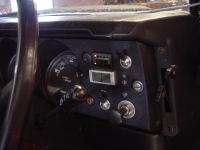
 Fitted into a small space on the dash, and showing the mixture running on LPG at idle to be pretty good. The idea is that the gauge gives a rough guide to lean/rich running - and seems to do the job.

Fitted into a small space on the dash, and showing the mixture running on LPG at idle to be pretty good. The idea is that the gauge gives a rough guide to lean/rich running - and seems to do the job.

 Swapped some logs for this original exterior sun visor, and then gave it a couple of coats of Limestone paint

Swapped some logs for this original exterior sun visor, and then gave it a couple of coats of Limestone paint

 before fitting it in place, just in time for amazing April heatwave (and low sun) in Aberdeenshire

before fitting it in place, just in time for amazing April heatwave (and low sun) in Aberdeenshire

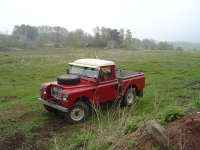
 and in use

and in use "in the field" as it were - actually keeping rain off the screen today rather than low sun...

 I ended up going

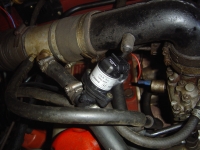
I ended up going "closed loop" with the LPG system - so fitted this stepper motor into the LPG vapour feed in place of the original manual valve

 Vapouriser on the upper right of shot feeding gas through the new stepper valve on left, before entering the mixer in the air intake pipe to the carb.

Vapouriser on the upper right of shot feeding gas through the new stepper valve on left, before entering the mixer in the air intake pipe to the carb.

 Fitted a new LPG/Petrol changeover switch (with LPG level leds) that came with the kit. Fitted the ECU that control all this behind the dash.

Fitted a new LPG/Petrol changeover switch (with LPG level leds) that came with the kit. Fitted the ECU that control all this behind the dash.

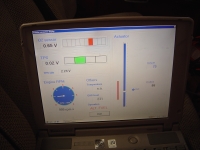
 Setting up using the software on a laptop - once done the ECU uses the lambda and RPM signals as input to dynamically control the LPG mixture - seems to work well so far

Setting up using the software on a laptop - once done the ECU uses the lambda and RPM signals as input to dynamically control the LPG mixture - seems to work well so far

 oh dear - an engine out job after only 1 year (2000 miles)...

oh dear - an engine out job after only 1 year (2000 miles)...

 good job I'd just added another beam in the garage for lifting engines - only just enough height for this one though

good job I'd just added another beam in the garage for lifting engines - only just enough height for this one though

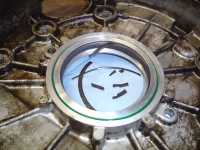
 and this was the reason - lots of oil from the rear crank oil seal

and this was the reason - lots of oil from the rear crank oil seal

 the new seal had failed after only 1 year of use

the new seal had failed after only 1 year of use

 It appears that a flat circular disk of rubber which sat in the middle of the seal unit between the casing and the lip part, had disintegrated and come out, allowing oil to pass behind the lip - I should have used Genuine Parts!

It appears that a flat circular disk of rubber which sat in the middle of the seal unit between the casing and the lip part, had disintegrated and come out, allowing oil to pass behind the lip - I should have used Genuine Parts!

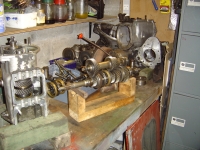
 Logrover has a rumbling reverse gear, so thought I'd look into rebuilding one of the gearboxes I dismantled about 8 years ago and then did nothing with...

Logrover has a rumbling reverse gear, so thought I'd look into rebuilding one of the gearboxes I dismantled about 8 years ago and then did nothing with...

 I

I "think" all these bits belong to one of the gearboxes (the later suffix D 'box)

 this is the layshaft and mainshaft of the other box, where i'm working out how things work

this is the layshaft and mainshaft of the other box, where i'm working out how things work

 handy to see how it fits in the main casing whilst checking operation on the shafts

handy to see how it fits in the main casing whilst checking operation on the shafts

 dismantling the 1st/2nd selector block to check for wear

dismantling the 1st/2nd selector block to check for wear

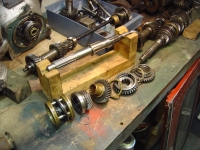
 mainshaft dismantled

mainshaft dismantled

 a new D suffix 3rd/4th synchro on the right, and the old one on the left

a new D suffix 3rd/4th synchro on the right, and the old one on the left

 worn brass synchro ring of the hub on the left, new one on the right again

worn brass synchro ring of the hub on the left, new one on the right again

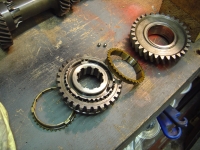
 new D suffix at the back, old D suffix left, old early type on the rights (different spline design)

new D suffix at the back, old D suffix left, old early type on the rights (different spline design)

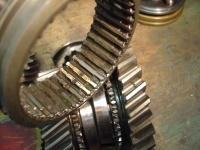
 Outer ring of the later 1st/2nd hub, and splines with indents which mesh with the small dog teeth seen below

Outer ring of the later 1st/2nd hub, and splines with indents which mesh with the small dog teeth seen below

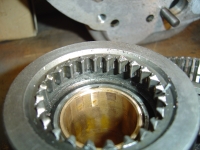
 later type 3rd gear showing modified splines to retain dog teeth on the overrun

later type 3rd gear showing modified splines to retain dog teeth on the overrun

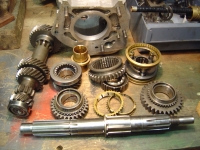
 the main bits

the main bits

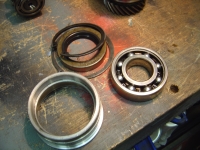
 rear bearing and housing and oil seal

rear bearing and housing and oil seal

Page 9 of 13 Next page